
Here is another blog post by Mike Hosker about IIS permissions in combination with WordPress addons on a VM:
First, I must start off with a confession here. I totally borked the file permissions I am about to show you the first time I did this and was subsequently up until 5am rebuilding the server. Do this at your own risk and as with all production changes be careful!
Recently I was tasked with setting up a server to host various client sites that I develop, mostly WordPress. So naturally I setup an Azure server 2019 VM and got to work installing the required prerequisites and installing the WordPress instances.
After a few hours of development I installed a plugin called WordPress Download Manager, oh man what a can of worms this opened.
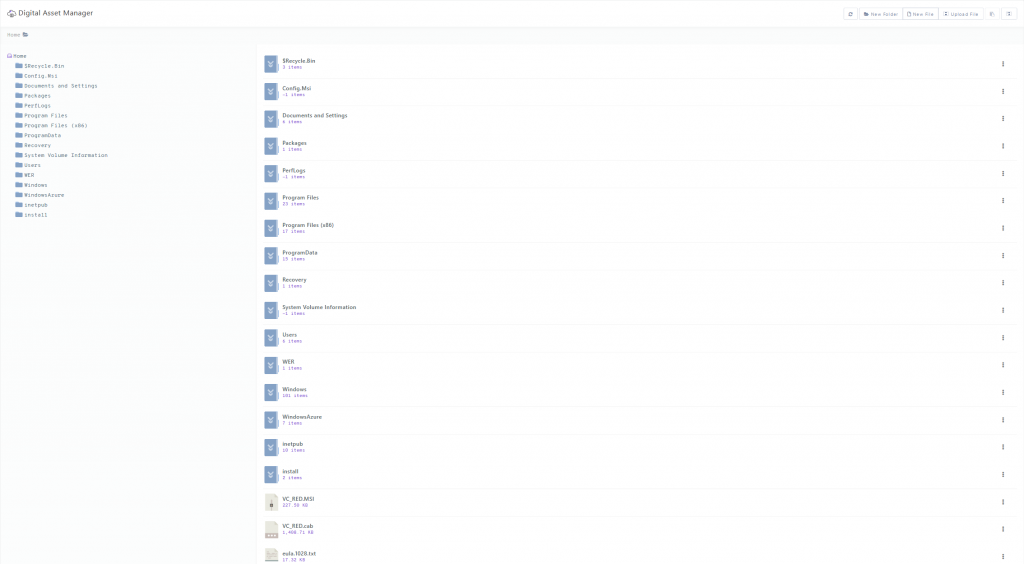
One of the “features” of the WordPress Download Manager plugin is a built in file browser they call “Asset Manager” which allows you to view your server files and create folders etc… great, an easy way to manage some of my media assets… right down to the C:\ drive with FULL permissions.
So as I am sure you are now all wondering, how do I fix this problem?!
First, the bad news… this problem is not limited exclusively to WordPress, due to the default IIS permission structure it can happen to any web app you deploy.
For example in a PHP application some simple code could be written to list the directory structure in the directories above the website directory and right into the C:\ drive, by the same method those files could also be opened and read.
This is particularly bad in two scenarios :
- You are giving legitimate access to client websites hosted in directories on the same server, allowing them to install a plugin as I did or modify / upload scripts to potentially read / write other clients sites and data.
- If a site is compromised or a bad actor is able to gain write access to the website files potentially through a front end vulnerability then they have the potential to not only affect the site with the vulnerability but all other sites and folders hosted on that same server.
Now, lets get onto the solution.
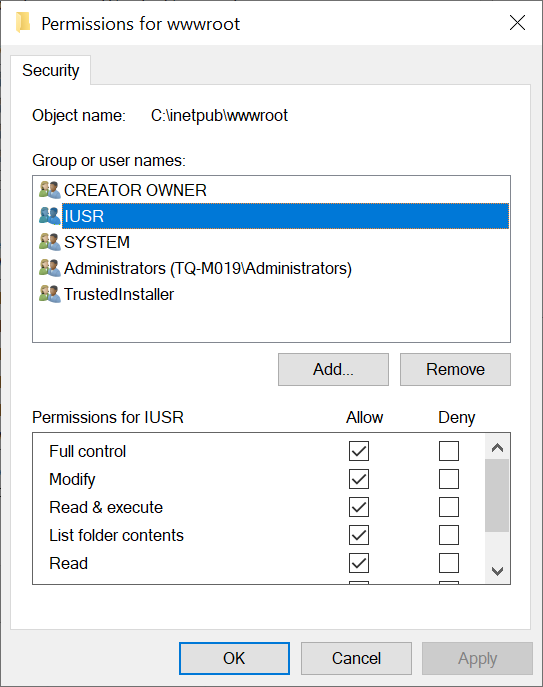
First, we navigate to the directory containing website we want to apply the permissions fix to, right click -> “Properties” -> “Security” tab -> “Edit” which should show the following screen containing the following permissions.
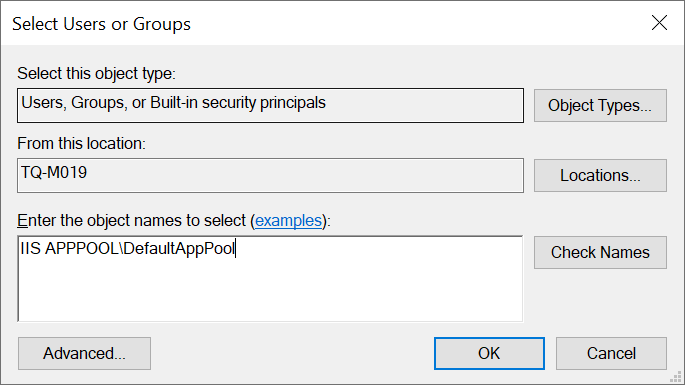
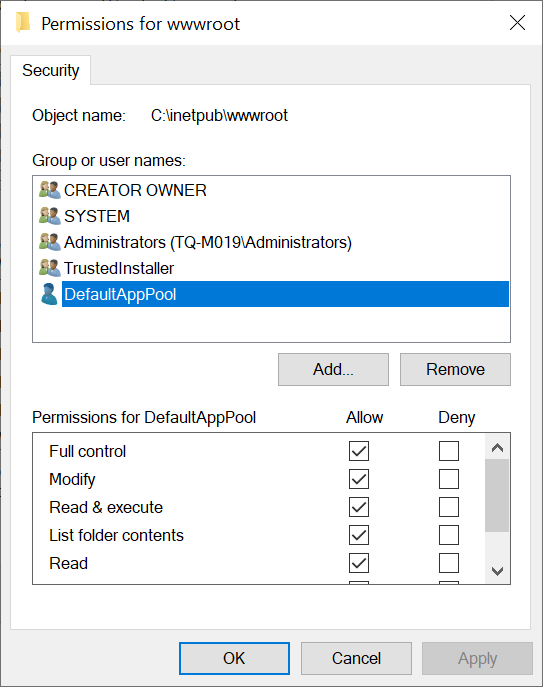
We want to add the application pool to these permissions, the reason why will become clear later. To do this we select “Add…” and type “IIS APPPOOL\yourapppoolname” replacing “yourapppoolname” with your websites application pool name which is normally the same as the IIS website name. It should look something like this…
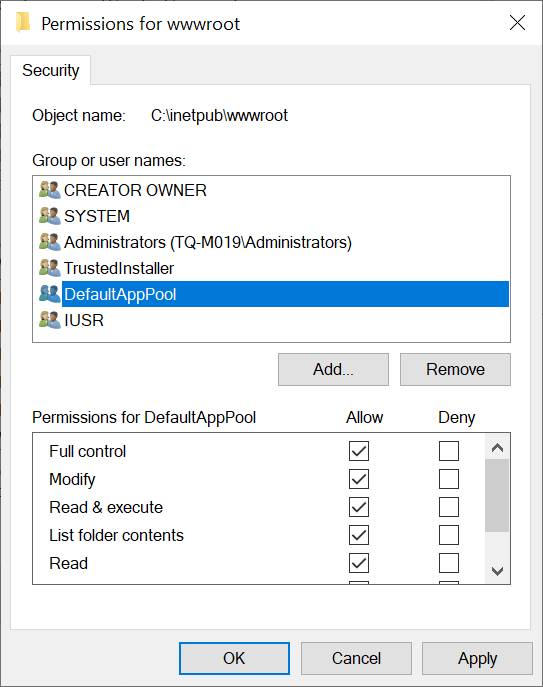
Now click OK and make sure to give that app pool identity the appropriate permissions for your web app to run. Your permissions should then look something like this…
Next we head into the IIS management console and find that same website we just adjusted file permissions on, here we click on “Authentication” as seen below…
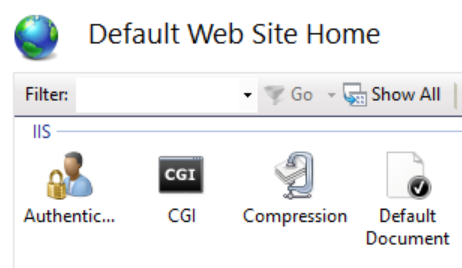
You should then see a screen showing your authentication setup for that site, including “Anonymous Authentication”.
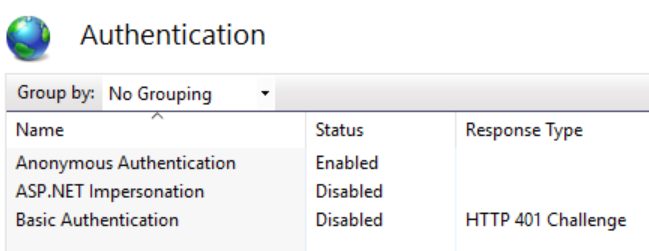
Right clicking and selecting “Edit…” should show the following screen…
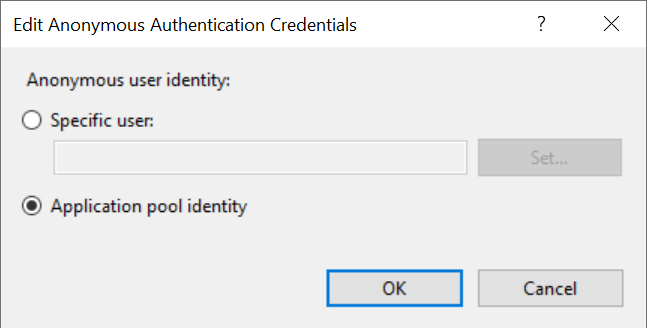
Here you want to make sure “Application pool identity” is selected. This will work because we have just given that account permission on the website directory.
Finally we want to clear up the old permissions we no longer need, so we head back to the security tab of the website directory, click edit and then click “IUSR” and remove. Your security permissions should then look something like this…
And that’s it! You now have setup your web app to use the application pool identity for anonymous authentication instead of the default IUSR.
Good luck!
Mike Hosker