
This is a continuation of the blog post series about using Microsoft monitoring tools to monitor a Philips Hue Bridge as an example of how to monitor an API based device.
To jump back to the first page of the series and the table of contents, click here.
Getting access to Philips Hue Bridge
Alright, we have a device setup on the network, and the official ways of talking to it are there (a mobile app on my phone). I searched and there is an API for this device.
Next step is to get access to the API.
Philips has a developer section on their webpage and for some things you need to register. But the first getting started page is basically all we need for our story.
Philips Hue Bridge getting started page
First main step is finding out the IP address of the Hue bridge on your local network. Several methods are possible such as discoveries, checking DHCP table, or looking in the Hue app.
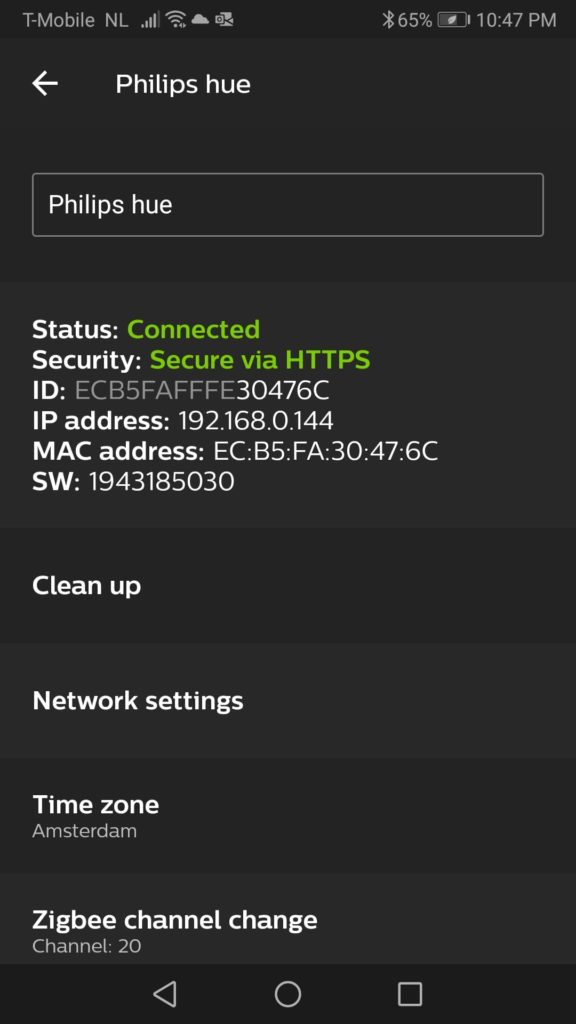
I open up the Hue app, go to Settings, select the Hue Bridges tab. Select the Hue Bridge and click the I information button next to it. The IP address is listed there. Write it down, because you will need it a lot.
Next we go to the CLIP debugger web page at: https://<bridge ip address>/debug/clip.html
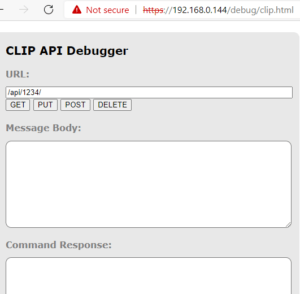
You get to that interface. This is a way to interact with the API directly from this exposed page (to the local network). We can go to the right URL’s in there and use the GET to read data.
In order though to do all of this through scripts, we need to create a User string.
Following the method on the Getting Started page linked earlier, we create a user. That gives you back a long string, and you need to make sure you save that one. You will be using it in every script later.
Getting Data through CLIP
While in the CLIP debugger interface we can now go to different URLs to see what we have.
For example the lights:
https://<bridge ip address>/api/<UserID>/lights |
Use that URL and fill in the values for your IP and your Username string. Put it in the URL field and click GET.
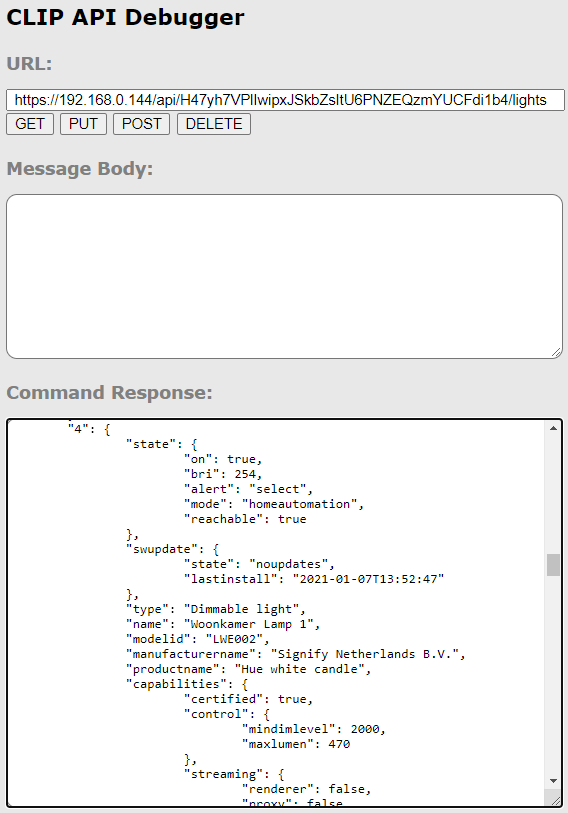
This dumps a list of all lights the Hue Bridge knows about.
Lights
In my example I scrolled down a little bit to light number 4 (first line in the command response field in the picture above). And we can see some info there. One of the first lines is State – On : true. SO that means I have it turned on at the moment of writing (and yes it is). A little bit lower we can also see the type and name and product name. The Hue white candle are smaller light bulbs and they are dimmable. And the name I gave this specific one is “Woonkamer Lamp 1” (Dutch for: Living room lamp 1).
This means we can get a JSON formatted list of all lights connected, with types, names, on-status and things like brightness. And if there are updates for it available.
Also we can manipulate some things in here, such as changing the name of a device. Some devices we can not change the name for, such as some of the hidden sensors later. Also we can change the state (turn light on or off), and maybe use dimmer or color changes if the light bulb supports it.
The Getting started page referenced above also has an example of manipulating a light to turn it on or off.
Sensors
Lets go to another link. In stead of using /lights at the end of the URL, now change it to /sensors
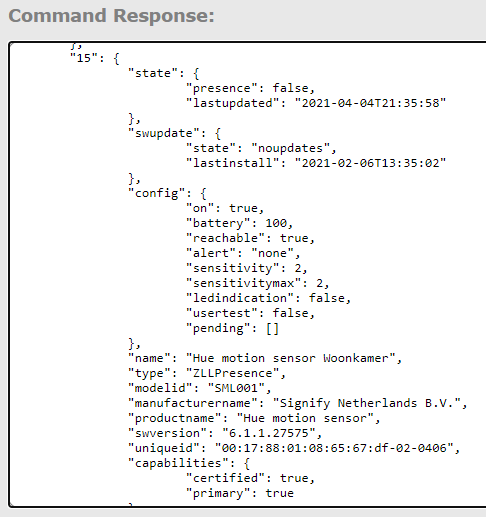
I scrolled down a bit to go to the same Living Room, where I have a motion sensor.
This one is sensor 15. AT the top we see State – Presence. Keep in mind this sensor turns back to false within a few seconds after you have visibly moved. It does list right below it the time of last movement (in UTC time). How that is relevant to the device is that it reacts to your movement of coming into a room. It records the time of movement. Next it turns on the lights for a number of minutes since that recorded time. In the living room I am not using this, but in the bathroom I have it turn on the lights for a number of minutes and automatically turn off again if no movement is recorded for a bit.
We see the type of this sensor is ZLLPresence. And there is a name there. This is the name you gave it in the Hue app on your mobile phone.
Now there is one thing I found out. First of all if you look in the sensors list you will see that this one motion sensor introduces several sensors.
Extra sensors
ZLLPresence, ZLLLightLevel, ZLLTemperature, and two times a ClipGenericStatus. For each of these motion sensors.
The second sensor inside this device is logical because we can see the light sensor, which lists the light level (I think it is in lumen *10). The thing is, there is no mention of this in the Hue app on the mobile phone. This also means we can not set the name through the mobile app. We can change it in the CLIP tool, by going to the right URL for this specific sensor ( /sensors/16 in my example) and by using the Body field in the CLIP debugger app to feed it a name change in the Message Body field in JSON format and POSTing it. We need to do this with the sensors we plan on playing with later.
Also the third sensor seems to be a temperature sensor. And it is. It gives the temperature in Celsius *100. I was surprised at this, because there was no mention of a temperature sensor being part of the motion sensor anywhere. Strange, but good to know. You could use this as simple temperature data of course, but you could also use this temperature input as a way to automate your heating system if it can be digitally manipulated! I am not doing that right now, but that would be fun to create.
We now have two generic URLS for /lights and /sensors and we know how to get into one specific one by adding its number at the end of the URL and running the GET command again.
I found a few more sensors actually, which are built-in and function with the Hue app and the Hue Bridge.
- There is a sensor which lists the daily sun-up and sun-down time for our time-zone and this specific date. This can be used by the automation in the Hue Bridge. For example so it can turn on the lights a few minutes before sun-down and turn them off a few minutes after sun-up, and all of this would work for every day as the seasons change.
- There is a proximity sensor in the Hue bridge automation. This is connected to the mobile phone. The idea is that when you come home from a trip, your phone joins the local network again and the lights can be turned on by the home automation.
PowerShell it
I pulled up Visual Studio Code and created a ps1 file.
Created two strings to keep my Bridge IP address and User name string.
Next I started building the URLs I needed.
And it failed.
Why?
Well, because in the web browser it actually already gave a problem about the self-signed certificate of the device, which I can not change. So the browser started complaining to me about it and I could ignore it and click through. The script really does not like it. It took a bit, but I found a PowerShell function online somewhere, which will ignore the self-signed certificate. After that I could continue building the URLs to collect the data.
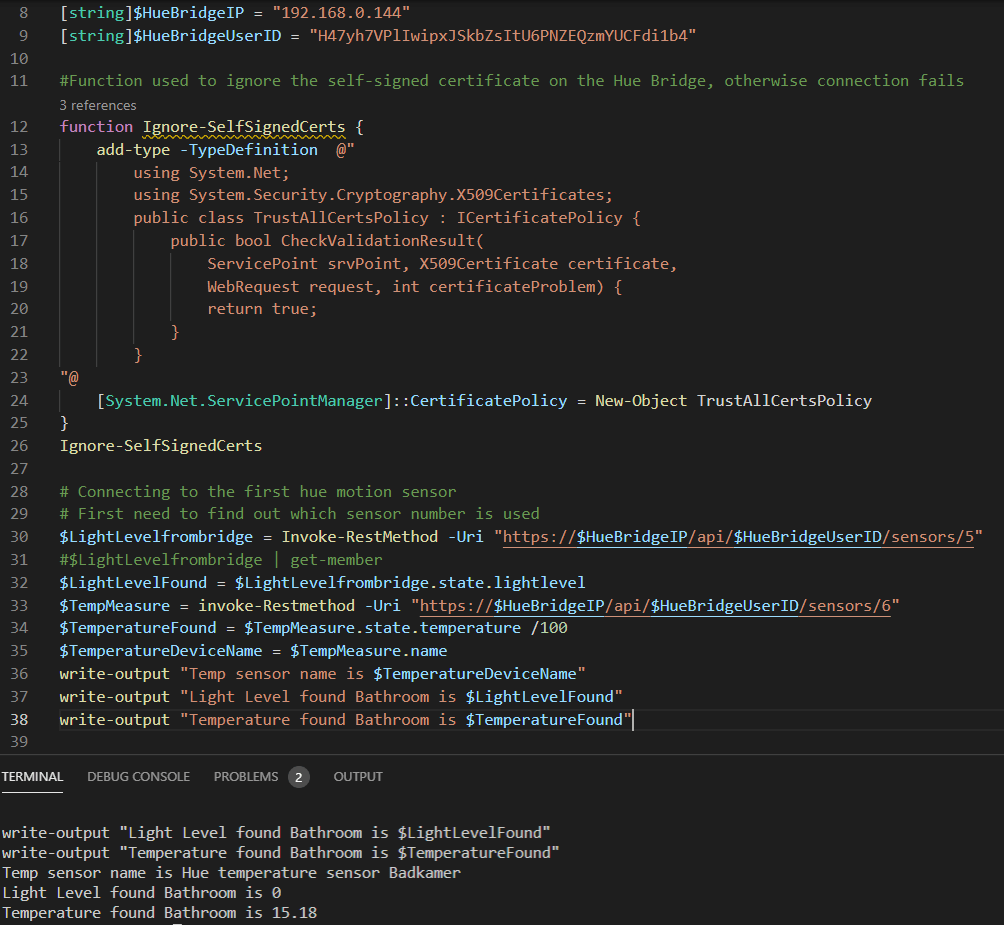
Lines 8+9 are the strings specific to my situation.
Lines 12-26 are to ignore the self-signed certificate.
Line 30 gets the data from one specific sensor, which is the light sensor inside the motion sensor in the bath room. We are using an invoke-restmethod for this. And in Line 32 we are pulling the value for the lightlevel out of the sensor.
In lines 33-35 I am getting the data from the sensor 6 which is the temperature sensor in the motion sensor in the bath room. Next I get the temperature value and immediately device it by 100. and I extract the name given to the sensor. As stated before I needed to manually adjust it through the CLIP debugger before.
At the bottom we can see the output is light level 0 (yes it is dark there right now), and a temperature of 15 Celsius.
Result
At the end of this post:
- We found the IP address of the Hue Bridge device
- We set a new user string
- We checked the output of the lights and sensors available through the CLIP debugger interface on a web browser.
- We noticed more sensors than expected, which we can play with later.
- In VS Code started PowerShell code to get into the device from a script. Needed to workaround the self-signed certificate.
- We can get data from specific sensors or lights from PowerShell
Now that we have found a way to talk to the device through PowerShell and the API, we can continue to put data in SCOM (in this case).
In the next step in this case we are thinking about SCOM and to create a management pack. This does involve a few steps. In the next post we are thinking about how to describe the Hue Bridge and the attached lights and sensors through the class model.
Bob Cornelissen