
Until now, we’ve created the lab and explored the cluster options and settings. Now finally, it is time to create some virtual machines. Let’s get straight into it!
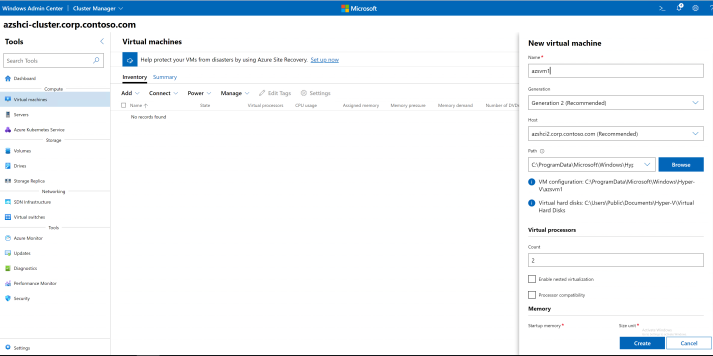
Let’s hit Add in the Virtual Machines button on the menu. Give it a nice name, allocate the essentials like no. of virtual processors, memory and storage. Optionally you can attach an OS ISO file to boot from for installing the OS or you can also do it later.
So I did everything by the book, as Microsoft documentation told me to. I hit Create, and waited. I waited some more, and then I waited for a lot longer, but the creation process was still “in progress”. Now, enough time had passed to realize that this actually wasn’t going to make any progress, and unfortunately it kept ticking away without failing and with no error message to work with. Hmm, not very helpful, (Microsoft)!
So with a bit of thinking and discussing around with my colleagues, I found something out, and the problem became apparent. Yes we have an S2D storage pool, but no volumes in it yet. Where will my VM find the storage to go sit in? You’d think it should create a volume on the go while being made, but apparently that’s not the case. Okay then, we’ll just have to go and create a cluster shared volume (CSV) ourselves.
So let’s head over to Storage > Volumes. Let’s create a new one. Thankfully, it is actually pretty straightforward. Give it a name, resiliency method, and size and you’re set.
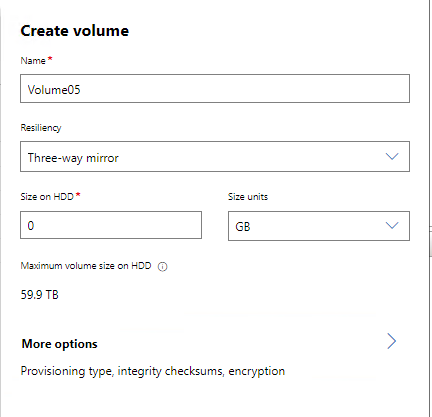
So I went ahead and created total of 4 CSVs, just so that we have them available should we need them in future. Alright, so let’s go back to Virtual Machines and see if we can make any progress this time.
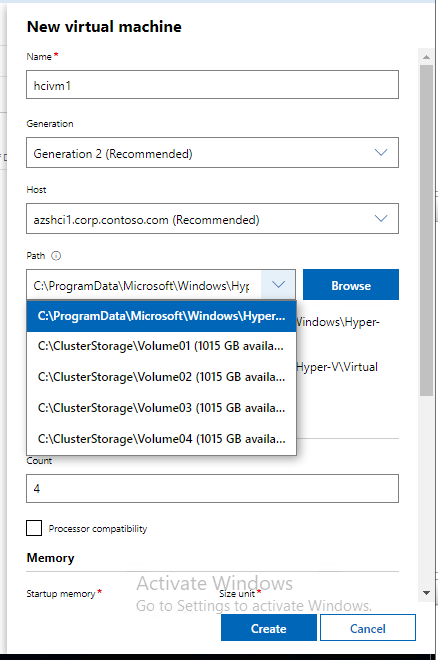
Give it a name, choose the generation default, and select the host (node) you want to deploy this VM to. Under Path, you’ll notice that you now have a dropdown for the Cluster Shared location that is hosting our CSVs we just created. Let’s go ahead and choose one.
VM configuration path is cluster shared while the VHD path is local to the node you selected under Host.
As you can see, it’ll tell you the locations where the VM configuration files and the VHD files for that VM are being stored.
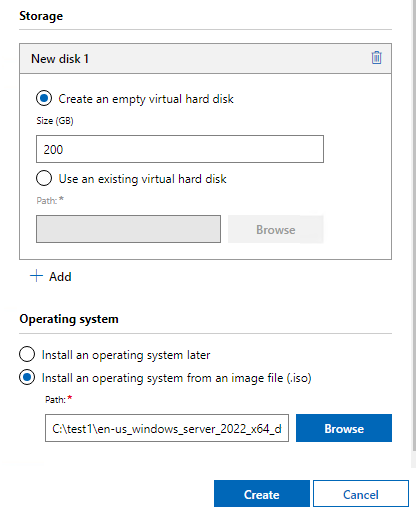
Make sure the path you store your ISO file is local to the node you’ve selected under Or, you can create a shared path amongst all your nodes and paste your ISO there.

Make sure your VM configuration at startup (such as memory assigned and no. of virtual processors) falls within the possible values what the Host (node) can allocate you.
If you don’t have the ISO handy, you can add it later as well. In my case I went ahead and downloaded my Windows 2022 OS ISO file to my shared path so I’ll go and select that.
Okay then, all should be done so let’s go hit that Create button!
Uh oh. Still no success. I think I know the problem though, and it has to do with the fact that we haven’t registered our cluster to Azure yet. So it looks like we’ve hit the limit of what you can do without registering the cluster, and the short answer is – not much! You can only look around and browse, but to create anything on the cluster itself you’ll need to register the cluster to Azure.
Also, looking through the event logs on these nodes of the cluster I also noticed a consistent error telling me to register the cluster to Azure within 30 days of its creation. So let’s just go ahead and do that right now.
Registering the cluster with Azure
Thankfully, the process to registering the cluster is pretty straightforward.
All I did is run this PowerShell cmdlet and within 10 minutes, it was done. (assuming you’ve got all the prerequisites such as permissions in place)
Register-AzStackHCI -SubscriptionId "<yoursubscriptionidhere>" -ComputerName <name of any node>

Creating the VM
Follow Thomas’s step-by-step procedure to creating a VM here for reference.
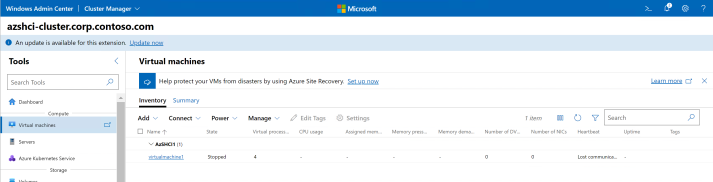
And finally, our VM is created! Now if you try to power it on, it should get started.
Now as you try to connect to this machine, it’ll prompt you to first allow remote access to this machine which is rather easy to do.
However, keep in mind that this is a guest machine on one of our nodes and it has no secondary OS installed on it yet. Let’s take a break here for now, but that is exactly what we’re going to do in the next one, so stay tuned!